GUIDE · POTFORGEDrainage and wall thickness for a 3D-printed planter
Every pot from KUZE Potforge starts with drainage that works: a honeycomb grate in a drop-in drainage plate, and seven legs whose gaps run as channels into the drain hole, so water escapes sideways even with the pot on a saucer. The wall is 3 mm and the base 10 mm. Most plants need nothing more. Change it when a plant wants faster drainage or more air at its roots, or the pot needs a sturdier wall. Everything below is in the editor's All settings view.
Drainage through the bottom
Under Drainage, choose how water leaves through the floor.
- Honeycomb grate
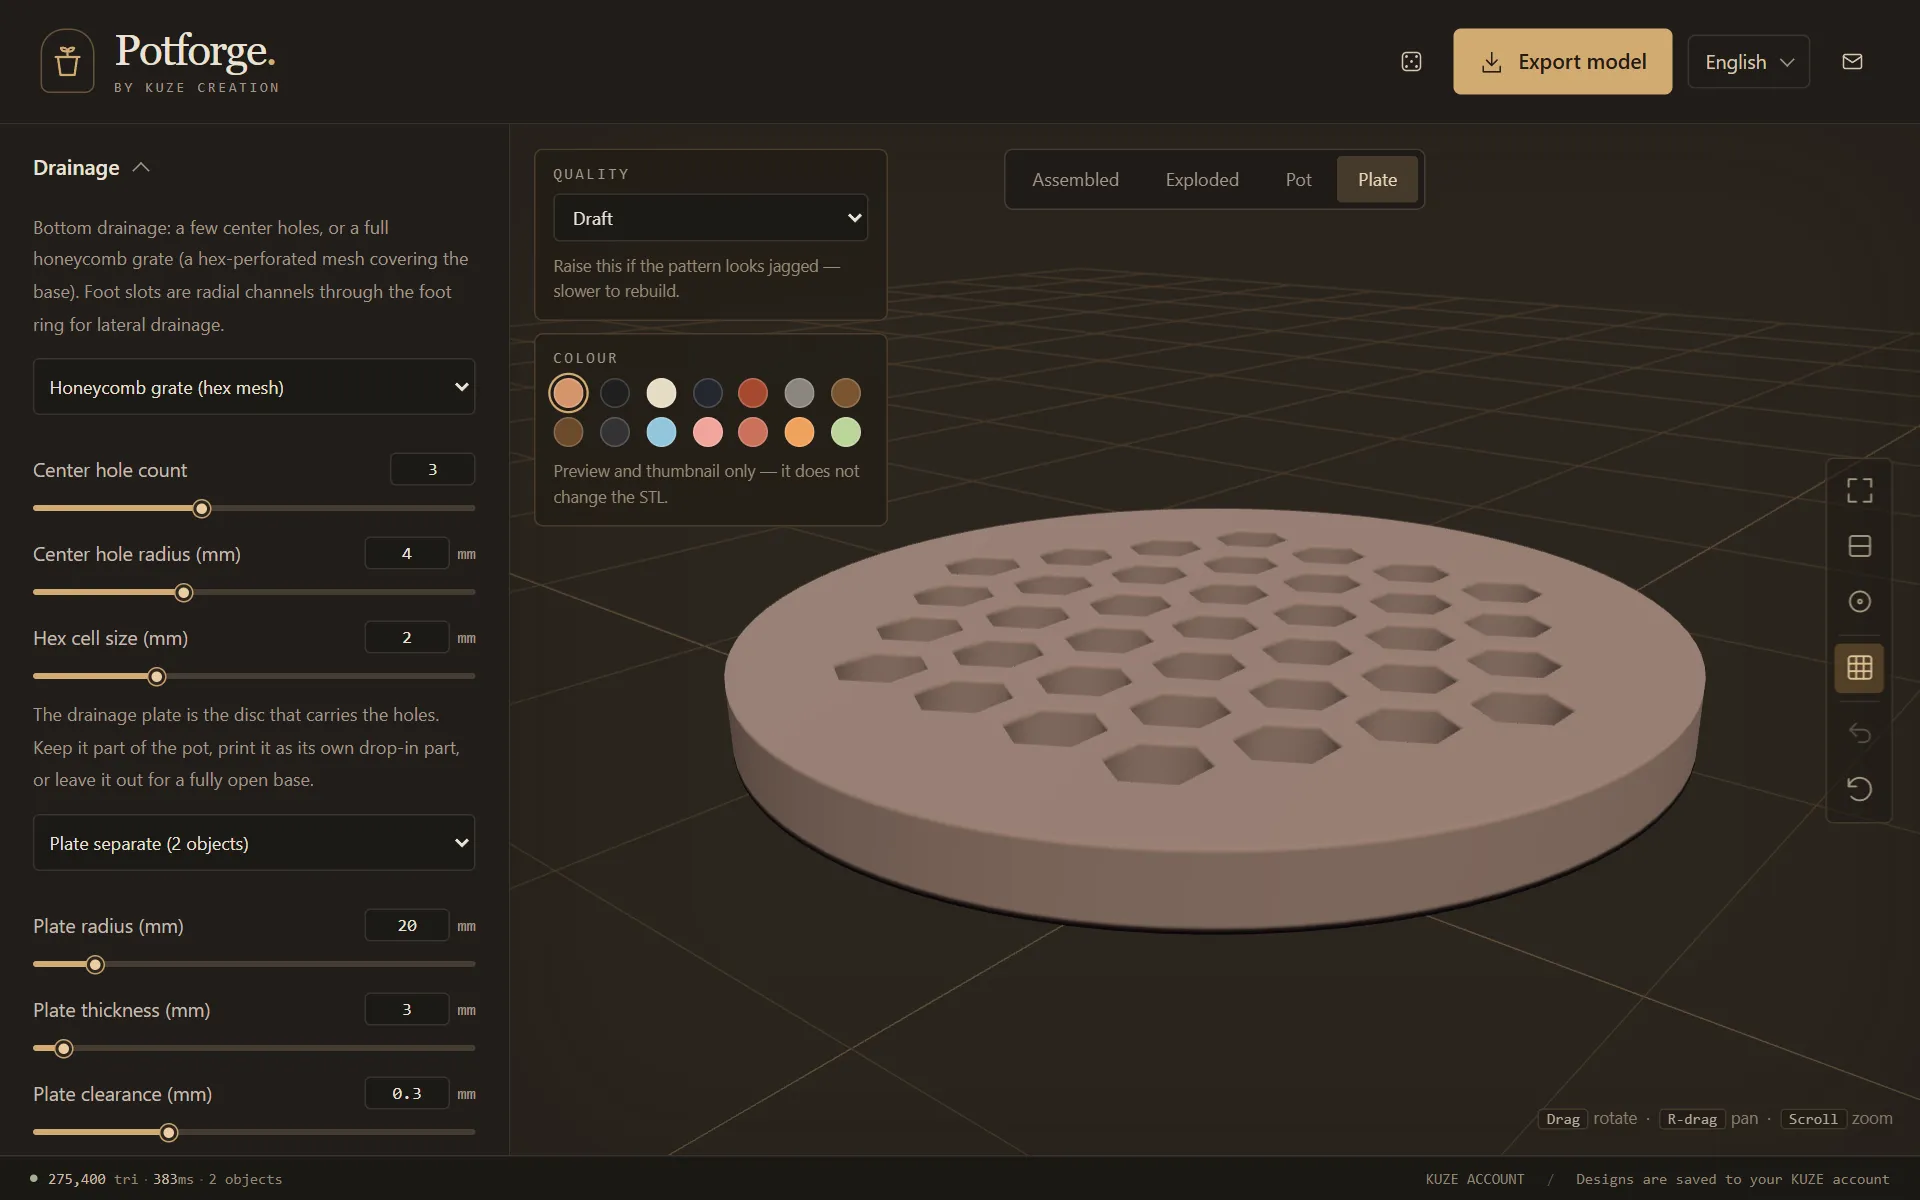
- The default: hexagonal cells over the whole drainage plate. Hex cell size runs from 0.5 to 6 mm and starts at 2 mm. Below about 1 mm, cells can close up when printed on a 0.4 mm nozzle.
- Center holes
- Round holes through the floor: Center hole count 0 to 8 (3 to start), Center hole radius 1 to 10 mm (4 mm to start).
The drainage plate
The drainage plate is the disc that carries the grate or the holes. It sits in a seat in the base.
- Plate separate
- The default. The plate downloads as its own STL, prints flat on the bed, and drops into the seat. You can lift it out to clean it.
- Plate integral
- The plate is part of the pot: one file, nothing to fit.
- No plate
- Leaves the opening in the base open.
- Plate radius
- The size of the opening, 6 to 115 mm (20 mm to start). It is capped so a 2 mm ledge always remains for the plate to rest on.
- Plate thickness
- 1 to 39 mm (3 mm to start), and always thinner than the base.
- Plate clearance
- The gap round a separate plate, 0.3 mm to start. Raise it if the plate is tight; lower it if it rattles.
Legs and sideways drainage
Under Foot, the legs decide where the water goes once it is through the plate.
- Solid underside
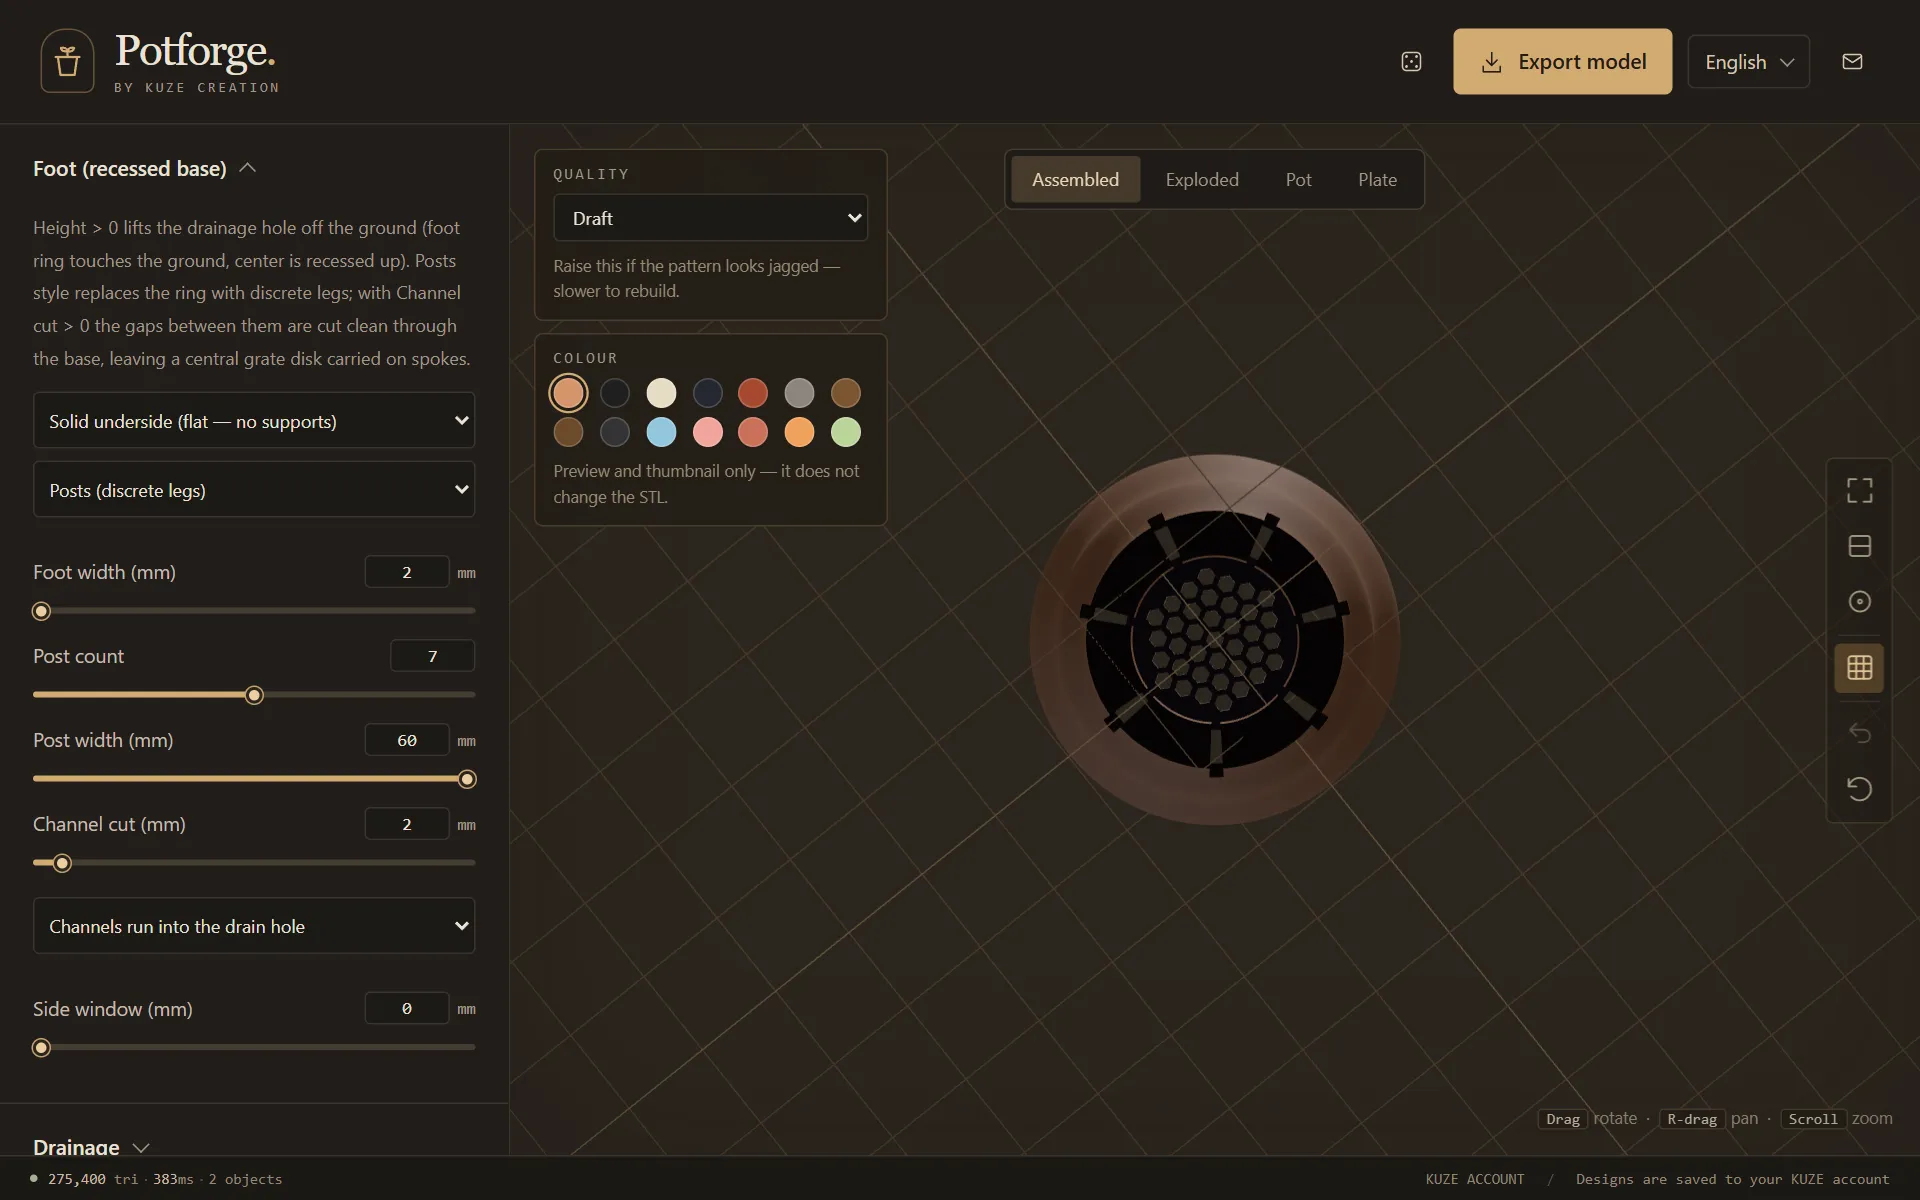
- The default. The base sits flat on the table and prints without supports; the gaps between the legs are cut right through the base as slits that drain sideways.
- Recessed underside
- Raises the pot on its legs, Foot height 0 to 20 mm (5 mm to start), lifting the drain hole off the ground. The floor between the legs is then printed in mid-air, so check the print settings guide.
- Posts or Ring
- Posts (the default) gives separate legs, 2 to 12 of them (7 to start). Ring gives one foot ring with drainage slots cut through it: Foot slot count 0 to 12 (3 to start), Foot slot width 1 to 20 mm (5 mm to start).
- Channel cut
- How far inward the gaps between the posts cut through the base, 0 to 40 mm (2 mm to start).
- Channels run into the drain hole
- The default. Each channel runs right in to the drain hole, so water that falls through the plate runs out sideways even with the pot flat on a saucer. It needs Posts, a solid underside, a separate plate or none, and no twist. Channels stop in the base keeps them short.
- Side window
- Carries each channel up past the inside floor and out through the wall, 0 to 60 mm high (off to start), so water runs out at floor level instead of pooling. It needs a channel cut.
Air at the roots: breathable vents
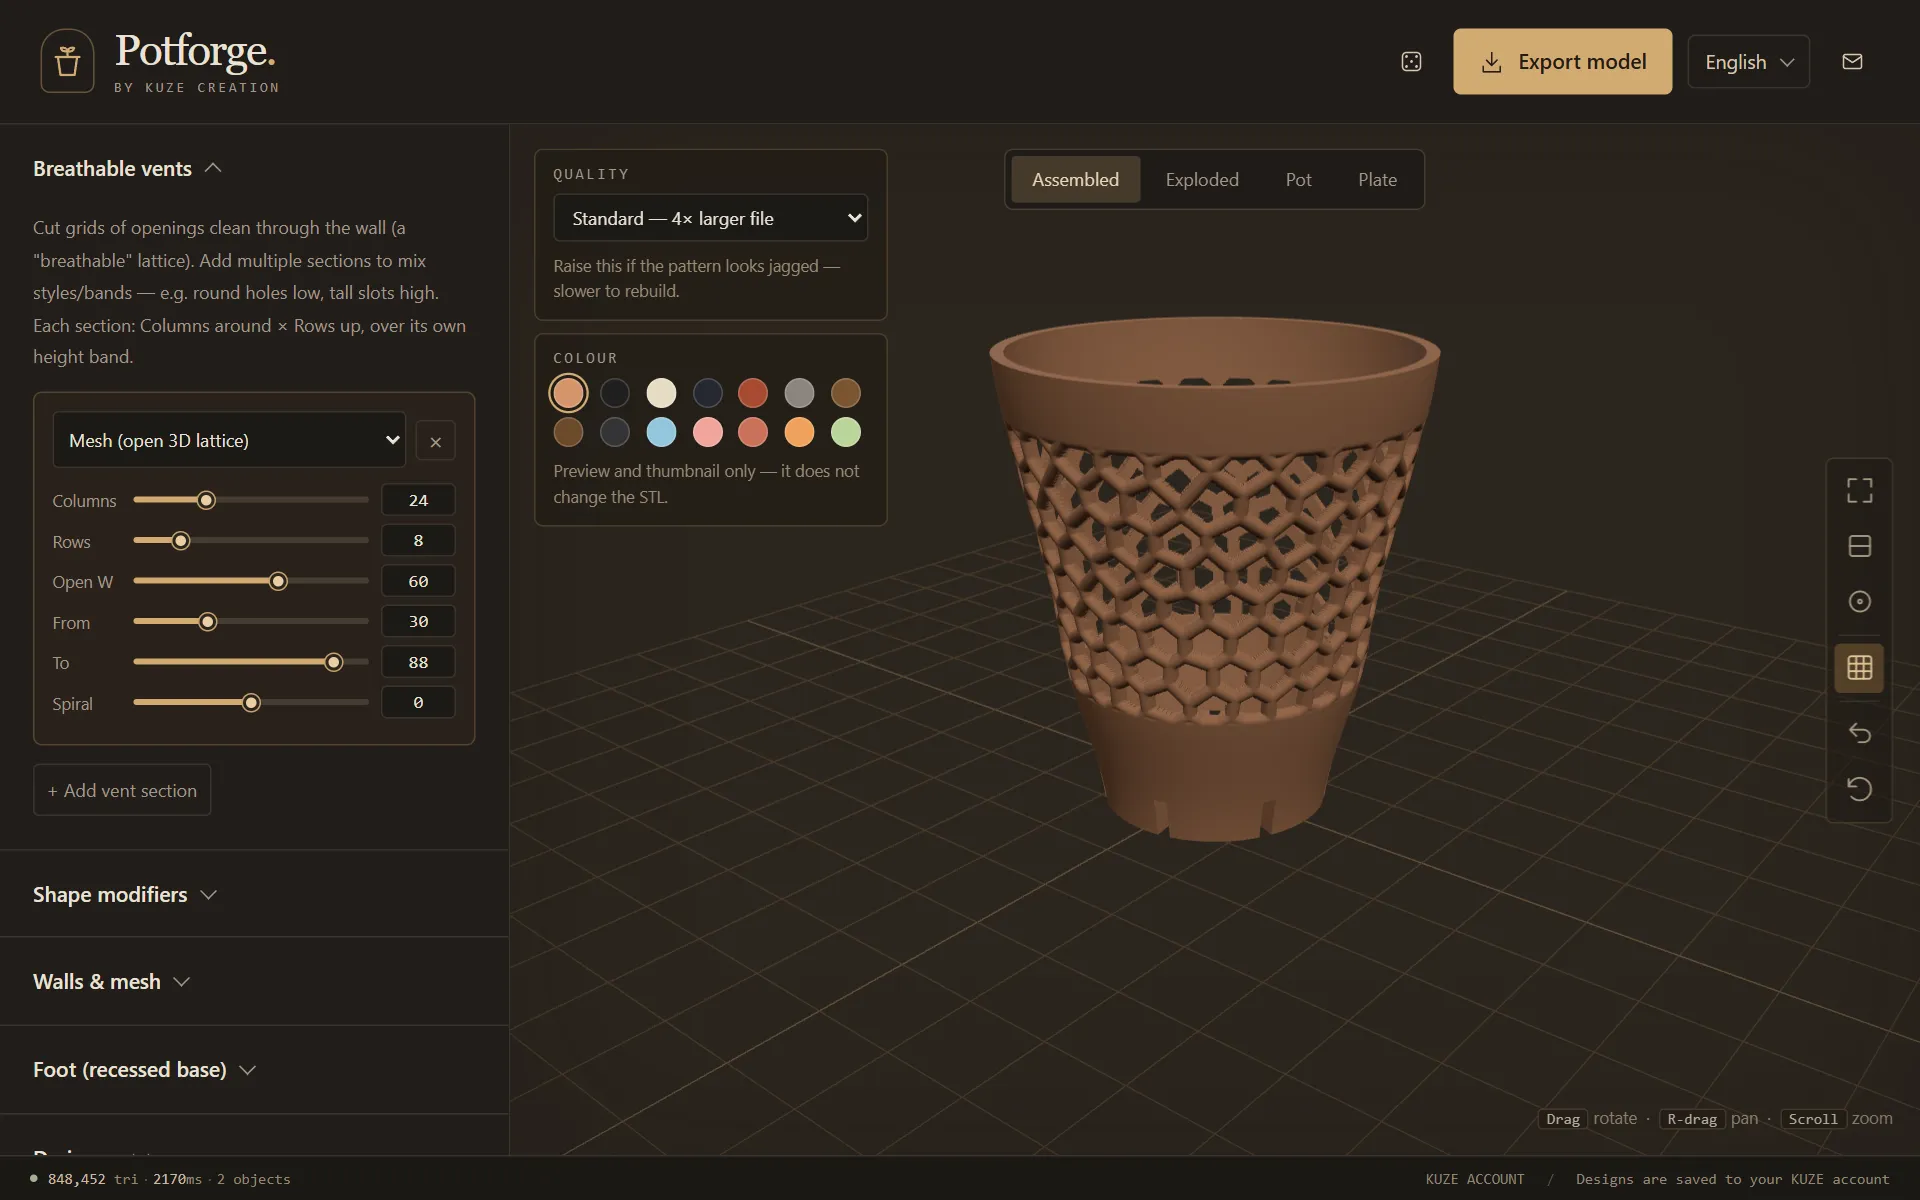
Breathable vents cut openings right through the wall, in bands. Each vent section has its own shape, a number of columns round the pot and rows up it, and its own height band; add several to mix them, such as round holes low and tall slots high. Shapes: Slot, Round, Diamond, Hexagon, Triangle and Mesh.
- Mesh turns a band into an open lattice. Its strands are never thinner than 1.6 mm, four lines of a 0.4 mm nozzle, and its openings have pointed tops, so it prints without supports.
- Vents suit plants whose roots like air, such as orchids in bark. With a fine potting mix, keep the openings small or high up, or the mix washes out.
Wall and base thickness
Under Walls & mesh:
- Wall thickness
- 1 to 8 mm, 3 mm to start: six or seven lines of a 0.4 mm nozzle, which suits most pots. Use about 2 mm for a small pot, and 4 mm or more for a large or tall pot full of wet soil, or one that lives outside. An engraved pattern and vents take material out of the wall, so keep it thicker where they are.
- Bottom thickness
- 1 to 40 mm, 10 mm to start. It carries the plate's seat and must be at least the foot height. A thicker base makes the pot heavier and steadier.
Press Check mesh integrity after changing any of these: it confirms the pot is still a closed, printable solid.
Questions
Does a 3D-printed planter need drainage?
For a plant that lives in it, yes: water that cannot drain collects round the roots. Every Potforge pot starts with a honeycomb drainage plate and legs that let water run out sideways, so it drains even standing on a saucer.
Honeycomb grate or centre holes?
The honeycomb grate drains across the whole plate and is the default. Centre holes, 1 to 8 of them, suit a chunky mix or a pot where you want water to leave in a few places. Both sit in the same drainage plate.
Will soil fall through the honeycomb?
The cells start 2 mm across, small enough to hold most potting mix. A fine mix can wash through a little at first; a thin layer of coarse grit over the plate stops it. Smaller cells hold more, but at 1 mm and under they can close up when printed.
What wall thickness should a planter have?
About 3 mm, where Potforge starts, suits most pots: six or seven lines of a 0.4 mm nozzle. Go down to 2 mm for a small pot, and up to 4 mm or more for a large or tall pot full of wet soil, or one that lives outside.
Why do the legs have channels?
On a flat underside the gaps between the legs are cut as channels that run right in to the drain hole. Water that falls through the plate runs out sideways along them, so the pot drains even when it stands flat on a saucer.
Free to design, nothing to install. Next: slicer settings for a planter, or all guides.